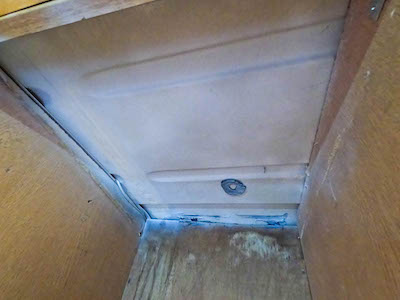
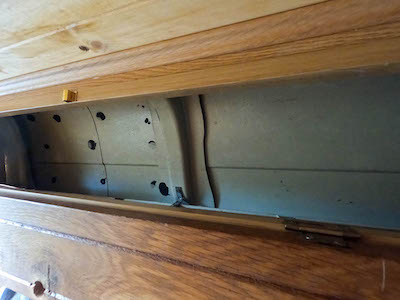
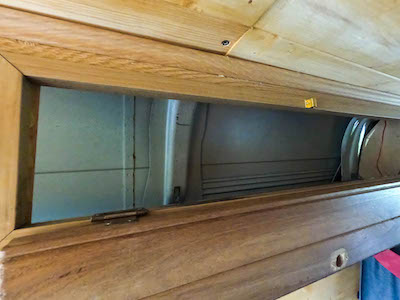
The campervan here is quite old (2000) and the conversion probably between 15-20 years ago, so it's relatively basic and it's needed a lot upgraded and replaced. One thing missing is decent insulation, and that's been rectified in the roof and some side areas when the old board was replaced with tongue and groove cladding, giving access to add a lot of fibre glass insulation. One area that hasn't been changed to allow adding of insulation is the top storage cupboards. Inside them is the bare skin of the outside van and the exposed structural members.
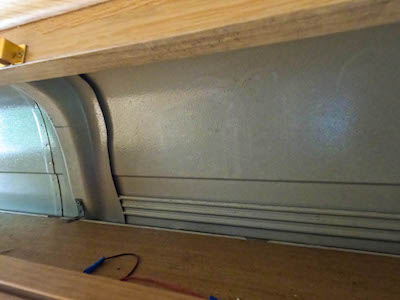
This wasn't an issue in the summer months, but with the colder autumn months here it became clear that a lot of condensation was forming. There was so much it was dripping down into the living area! Inside the van with people breathing and cooking the water vapour in the air would increase, even though the extractor fan was on while cooking, and overnight the moist air would condense onto the bare van walls inside the cupboards. The water drops would then start to run down on to the cupboard contents if they were touching, or down the sides of the van.
What is Condensation?
Condensation is the process of water vapour in the air turning into liquid. Condensation is caused by the temperature change of a surface. Condensation is a process that happens when water vapour in the air turns into liquid. Condensation happens when there are changes in temperature on surfaces.
What Causes Condensation?
Condensation occurs when water vapor in the air cools and turns into liquid. When this happens, it can form on surfaces in places that are cool and moist. This includes the inside of a van if there is no insulation or vapour barrier. It also forms on uninsulated van windows or the windscreen when the warm and moist inside air meets the cold surface of the window.
Adding a Vapour Barrier
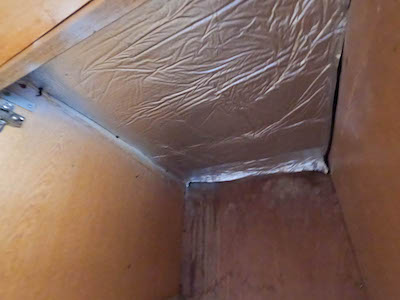
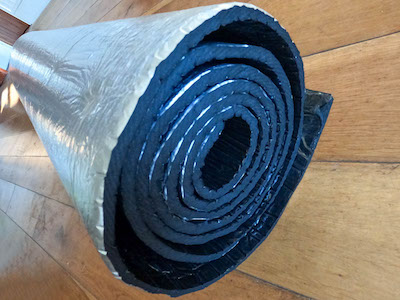
We decided that the easiest solution was to install a vapour barrier using Thermal Insulation Liner. We got some 12mm foam and foil liner with a self adhesive backing online after measuring what was going to be needed.
Rust Protection
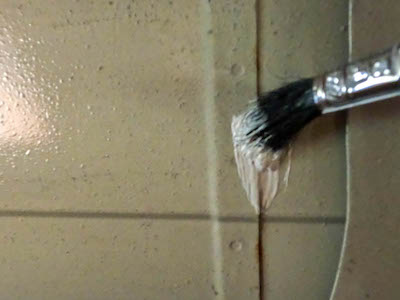
On closer inspecting the exposed van outer skin inside the cupboards a few small areas of rust were seen on the seems where the moisture had pentrated.
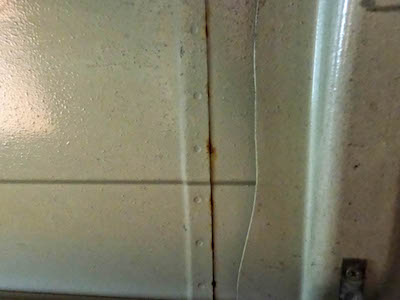
They were very small, but rust has a tendency to grow, so before adding the vapour barrier, which would stop any further inspection or ability to treat, the areas were treated with a coat of Hammerite. Even though the area would be sealed with an adhesive vapour barrier, it would be better not to leave exposed metal and rust patches just in case any moisture did get behind, now or in the future.
Adding the Vapour Barrier
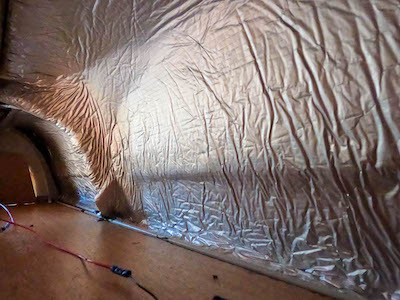
The roll of Thermal Insulation was 1m x 3m and after careful measuring it was cut down to give two lengths 45cm and 55cm wide and 2m in length, which fitted the cupboards on either side as they were not the same size.
The insulation was put in place with the adhesive cover intact so as to check the fit and mark out any cuts. It became clear that it would not be possible to remove the adhesive cover and place the insulation in one 2m length, so it was cut at the structural pillars making three pieces.
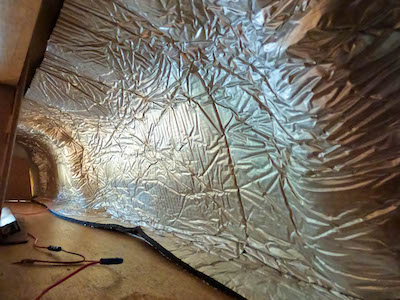
The adhesive cover was peeled off and the insulation pressed into place. There was also some final pieces added along the tops and sides to completely seal the van sides from the cupboard insides.
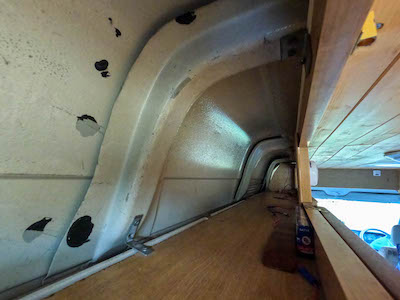
Other Storage Areas
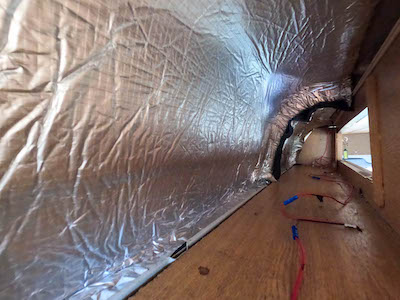
The spare insulation was used to cover the exposed van roof inside the large storage cupboard in which the top bit of plywood had been removed due to age and to give access to some areas of rust that had taken hold. These had previously been treated with undercoat and Hammerite and it was clear that moisture had been condensing on the surface. The Thermal Insulation Liner was added and will be monitored to see if it needs any more insulation and protection.